ENGR210
Cyber-Physical System Introduction
P0/P1/P2/P3 System Overview
Due: Sunday, January 18th
In Project 0, Project 1, Project 2, and Project 3, you will be working with a partner to create a cyber-physical system. This system will involve a Raspberry Pi 3B board and a pressure/temperature sensor. The system that you create will explore the use of different types of communication busses to interact with devices. You will be using the following interfaces: UART, I2C, and SPI. Additionally, you will be creating a network interface to your system to allow user interaction and data collection.
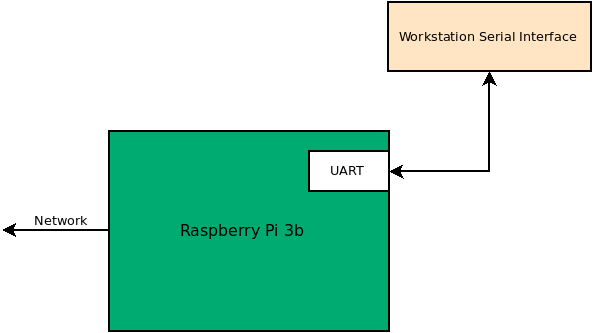
In Project 0, you will be connecting to your Raspberry Pi via ssh instead of the previously used UART that is shown in most diagrams. Once you are up and running on the Raspberry Pi, you will be cloning your repository in preparation for the other projects.
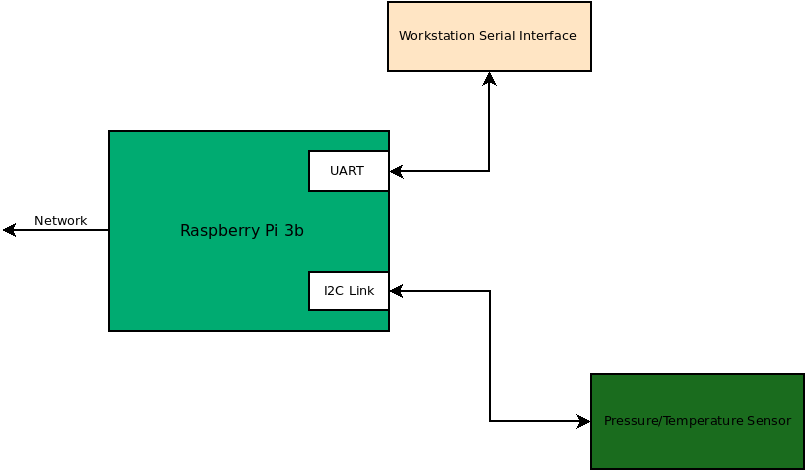
In Project 1, you will be adding a pressure/temperature sensor to your system. This sensor will be connected to your Raspberry PI via the I2C interface. You will be creating a python module to enable interaction with the sensor.
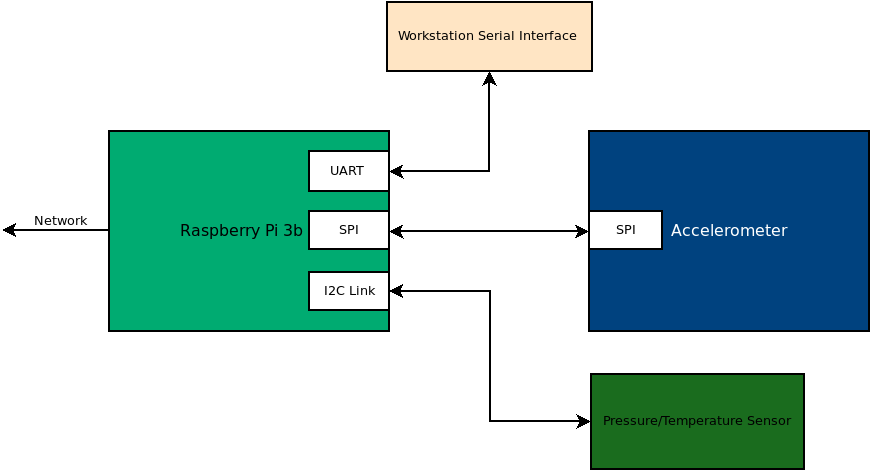
In Project 2, you will using the SPI interface to read from an accelerometer.
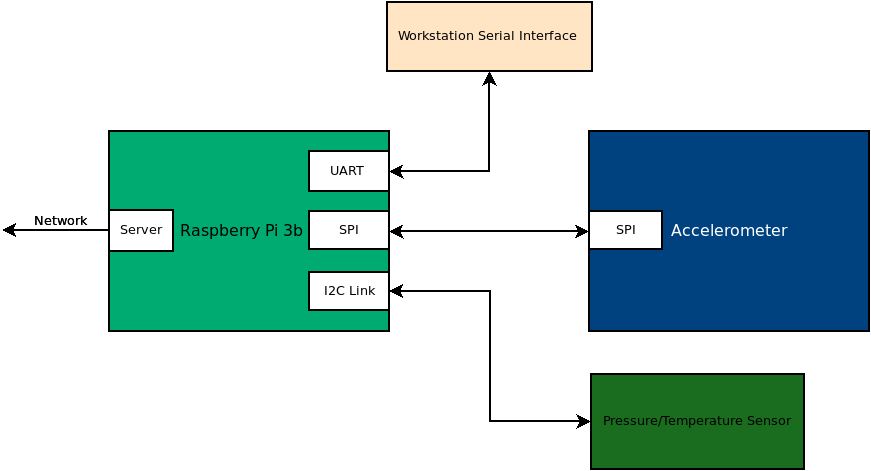
In Project 3, you will be using the wifi interface on the raspberry pi to enable user interactions with the device. Specifically, you will create system interfaces in python using Redis and Flask.
Project 0
Overview
In Project 0, you will be utilizing a Raspberry Pi board connected via ssh (previously a UART serial port). This interface will allow you to interact with the board from the command line as you would a typical linux system. You will use this connection to setup a wireless network connection to your board. Once you have a network connection, you will use this connection to clone your class git repository.
Resources
Raspberry Pi Setup
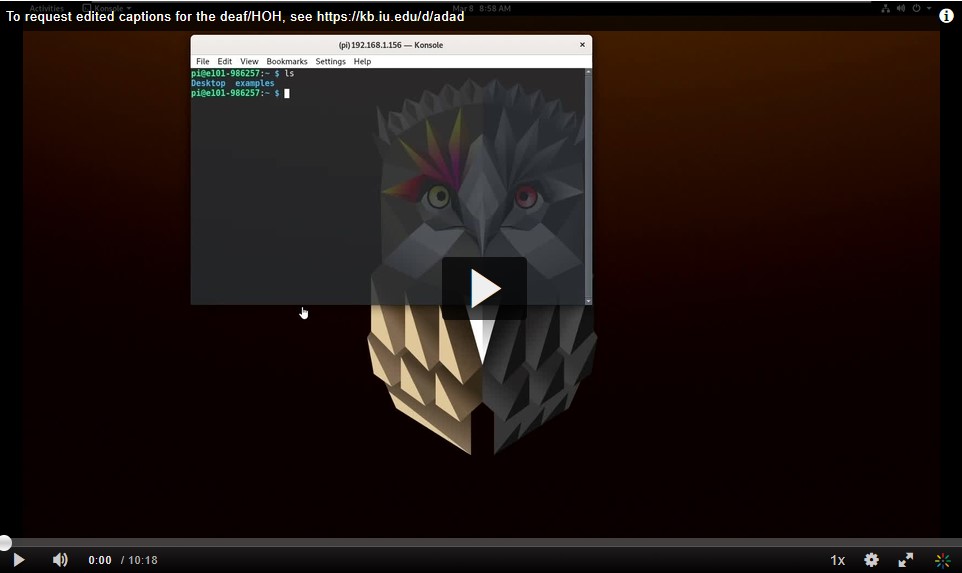
In this section, you will connect via ssh to the Raspberry Pi, power the system, and then log into the device.
To ssh into the pi, open a terminal on the lab computer and type the following, replacing <pi-serial-number> with the serial number on the white label on your pi.
ssh pi@ise-pi-<pi-serial-number>.luddy.indiana.edu
It should prompt you to enter a password, which is ‘e101class’. If you experience any issues with this, please ask the TA for help.
You can also use Putty to ssh into the Pi.
Git and Github
You will be using git to move files on and off your Raspberry Pi. If you are unfamiliar with git or just need a refresher, please read chapters 1-3 in the ProGit. Investing early in learning this version control system will make these project run much more smoothly.
Github Setup
You and your partner will share one github repository for the P5-P8 lab sequence. This repository will be setup on the IU Enterprise Github site. Decide which partner will be creating the repository. This partner should create a private repository named CPS-Digital-Design. You should add the following collaborators to your repository:
- Your partner
- frisch
- doemmert
- taloufi
- jesbgarc
- vmalbasa
Once you have created your repository, you should clone it on your Raspberry Pi. It is recommended that you use https for cloning this repository.
What to turn in (DUE 1/19 11:59PM)
Create a file named README.md. You may have created this automatically when the repository was created. This file is in markdown format. You will be using this file as a log of activities.
At the top of the README.md file put the names of both partners and the white tag number from your raspberry pi (barcode on the USB/Ethernet connectors of the board).
For this lab, please note the time/date/contributor/accomplishment. You should use a markdown table (see markdown reference) for this purpose. The table should be formatted similarly to the following:
| Date | Time | Contributor | Accomplishment |
|---|---|---|---|
| 1/11/2023 | 4:15 pm | Malintha Fernando | Completed P0 Project Document |
Once you have updated this file, commit and push it to your repository.
Both team members should submit a link to your repository in canvas.